A3 - TileSets in GameMaker
File Download
Download the tileset file here.
Below is an outline of the steps you need to follow:
- Open Assignment 2 in GameMaker. Assignment 3 will be an extension of this.
- Right click
Spritesfolder -> Create -> Sprite Importbutton -> choosedesert-tileset.png- Rename sprite to
sprTs_desertin the asset browser - Right click
Tile Setsfolder -> Create -> Tile Set - Click
No Sprite, switch it to yoursprTs_desertsprite - Set
Tile WidthandTile Heighteach to 16 (which is probably the default) - Rename tile set to
ts_desertin the asset browser - Rename the room
rm_main - Open
Rooms/rm_main - Add a new Tile layer between the background and instance layers, and rename it
base - Click on
No Tile Set, and selectTile Sets/ts_desert - Start creating the base layer of your room, which should include the ground that the player can walk upon.
- Above that, add a new tile layer to your room and call it
solid_basethat also uses the desert tileset. This should include ground features such as water that the player cannot walk on. - Above that, add a new tile layer called
objects, which includes objects that the player can walk through. - Above that, add a new tile layer called
solid_objects, which includes objects the player cannot walk through.
In the scripts folder, create a new script called tile_meeting and paste in the following code.
function tile_meeting(_x, _y, _layers) {

    // Normalize to array
    var layer_list;

    if (is_array(_layers)) {
        layer_list = _layers;
    } else {
        layer_list = [_layers]; // wrap single layer into array
    }

    // Loop through all layers
    for (var l = 0; l < array_length(layer_list); l++) {

        var tm = layer_tilemap_get_id(layer_list[l]);
        if (tm == -1) continue; // skip invalid layers

        // Get bounding box in tile coordinates
        var x1 = tilemap_get_cell_x_at_pixel(tm, bbox_left + (_x - x), y);
        var y1 = tilemap_get_cell_y_at_pixel(tm, x, bbox_top + (_y - y) + 30);
        var x2 = tilemap_get_cell_x_at_pixel(tm, bbox_right + (_x - x), y);
        var y2 = tilemap_get_cell_y_at_pixel(tm, x, bbox_bottom + (_y - y));

        // Check all overlapping tiles
        for (var xx = x1; xx <= x2; xx++) {
            for (var yy = y1; yy <= y2; yy++) {

                var tiledata = tilemap_get(tm, xx, yy);

                if (tile_get_index(tiledata) != 0) {
                    return true; // collision found
                }
            }
        }
    }

    return false; // no collision on any layer
}
Replace the step code in your object with the following code. If you've already customized the step code in your object, you may instead want to analyze the following code and just add the layer collision features.
// Settings
var move_speed = 4;
var collide_layers = ["solid_base", "solid_objects"]

// Input
var h_input = keyboard_check(vk_right) - keyboard_check(vk_left);
var v_input = keyboard_check(vk_down) - keyboard_check(vk_up);

// Calculate destination
var dest_x = x + h_input * move_speed
var dest_y = y + v_input * move_speed

// Move to destination if no collision
if (!tile_meeting(dest_x, y, collide_layers)) {
    x = dest_x
}

if (!tile_meeting(x, dest_y, collide_layers)) {
    y = dest_y
}

// Animation - prioritize horizontal movement if both are pressed
if (h_input != 0) {
    if (h_input > 0) {
        sprite_index = spr_player_walk_right;
    } else {
        sprite_index = spr_player_walk_left;
    }
} else if (v_input != 0) {
    if (v_input > 0) {
        sprite_index = spr_player_walk_down;
    } else {
        sprite_index = spr_player_walk_up;
    }
}

// Play animation when moving, stop when idle
if (h_input != 0 || v_input != 0) {
    image_speed = 1;  // Adjust to control animation speed
} else {
    image_speed = 0;
    image_index = 0; // Freeze on first frame
}
Setting up Camera and Viewports
With the room editor open, look for a Viewports and Cameras section in the inspector. Try the following initial settings, then modify to your liking:
- Enable Viewports - checked
- Clear Viewport background - checked
Under Viewport 0:
- Visible - checked
- Camera Properties - width=800, height=600
- Viewport Properties - width=800, height=600
- Object Following -
obj_player - Horizontal Border - 400
- Vertical Border - 300
The horizontal and vertical borders determine how far the player can walk within the frame until the camera starts following them. Setting these to half the viewport's width/height will cause the player to stay centred within the frame. Feel free to play around with other values here though.
Optional Extensions
Watch the auto-tiling portion of this video. Then, create the following two auto-tile templates:
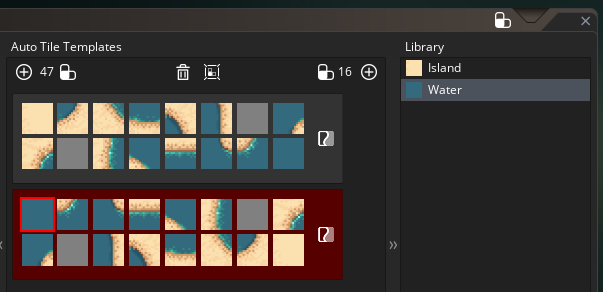
Add to your room using auto-tiling.
If you have extra time left over, try to file your own tile set at opengameart.org and create a second room with it.